Windmill 2.0
approx. 4 minutes readDid anyone try @windmill_io yet? It fill an interesting niche for indie devs that do not want to use hosted services for continuous integration. And unlike the Xcode bot mess, I trust @qnoid to actually make it work.
— Peter Steinberger (@steipete) February 19, 2018
Windmill was released on February 14th so that us, iOS Developers, could have an alternative to Jenkins for automating building and testing our iOS apps.
You can finally use a native macOS app alongside Xcode, which is highly integrated, to continuously monitor for code changes on your git repository, enabling you to always have your app ready to do a demo, public test or release.
Although Windmill requires next to no effort to get started, the initial release did not make it any easier to identify and fix failures than going through the logs. Here is where version 2.0 comes in, alongside many great features to help you with delivering a high quality app.
Build Failures
Windmill 2.0 highlights and surfaces build errors in a familiar way. This gives you a consistent view while debugging. It leaves no ambiguity as to how many errors there are, what these are and where each of them lies.
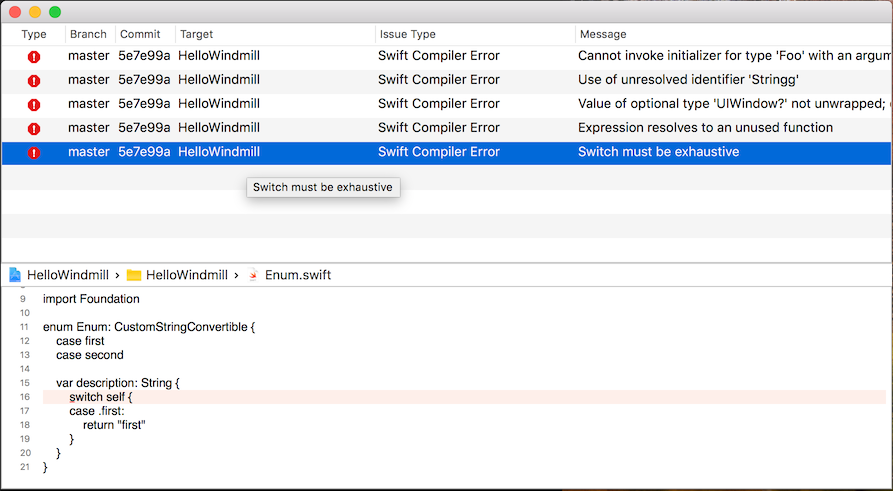
It is purposely designed in a way so that you do not have to learn new visual cues, communication language or put the mental effort required to associate Windmill errors to Xcode ones.
Since Windmill proactively builds your app for testing, you will get build errors for your test code too.
Test Failures
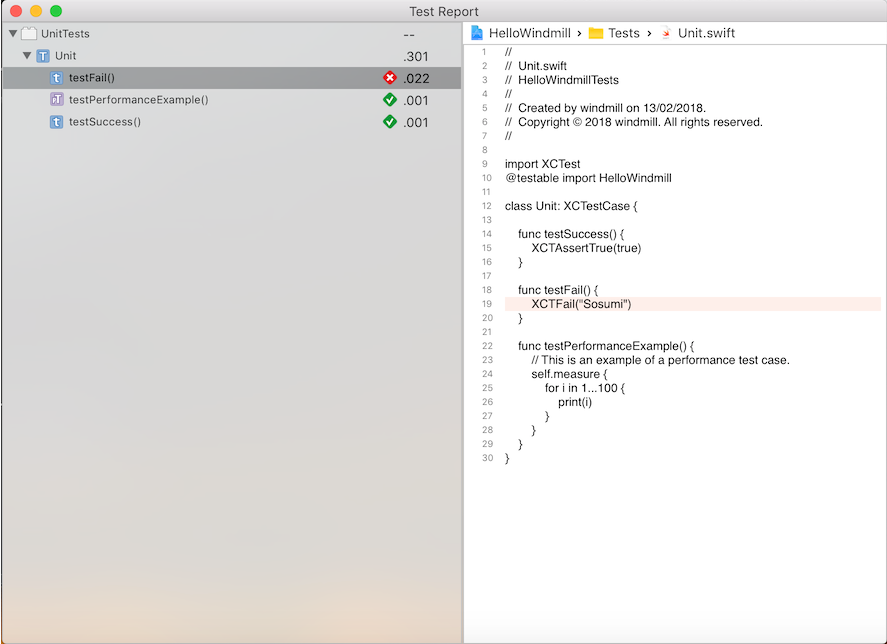
Another failure that Windmill will highlight is that of a test failing.
At a glance, you will be able to see if and how many tests have failed. In order to help you understand and cross check test failures with Xcode, Windmill will also give you a test summary.
More useful logs
As Windmill goes through your project, it will stop as soon as it encounters a failure. The Distilled Log will give you a more fine grained view of what Windmill was doing at the time of the failure (e.g. compiling a file) as well as a hint on how to fix it.

Simulator support
As part of building your app for distribution, Windmill will give you the option to launch the latest build of your app on the Simulator.
This can be useful when you want to check what your app looks like right there and then. It also enables you to install and run the app on the Simulator without access to the source code.
The app bundle
Each time you commit to master, Windmill will build your app bundle. You can choose to save it under the commit for future reference.
Terminal access
@windmill_io how best to manage dependencies in Windmill, like Carthage or pods?
— John Nye (@john_nye) February 20, 2018
hey @qnoid @windmill_io! Is there a support for projects using cocoapods?
— Viktor Malyi (@victormalyy) February 20, 2018
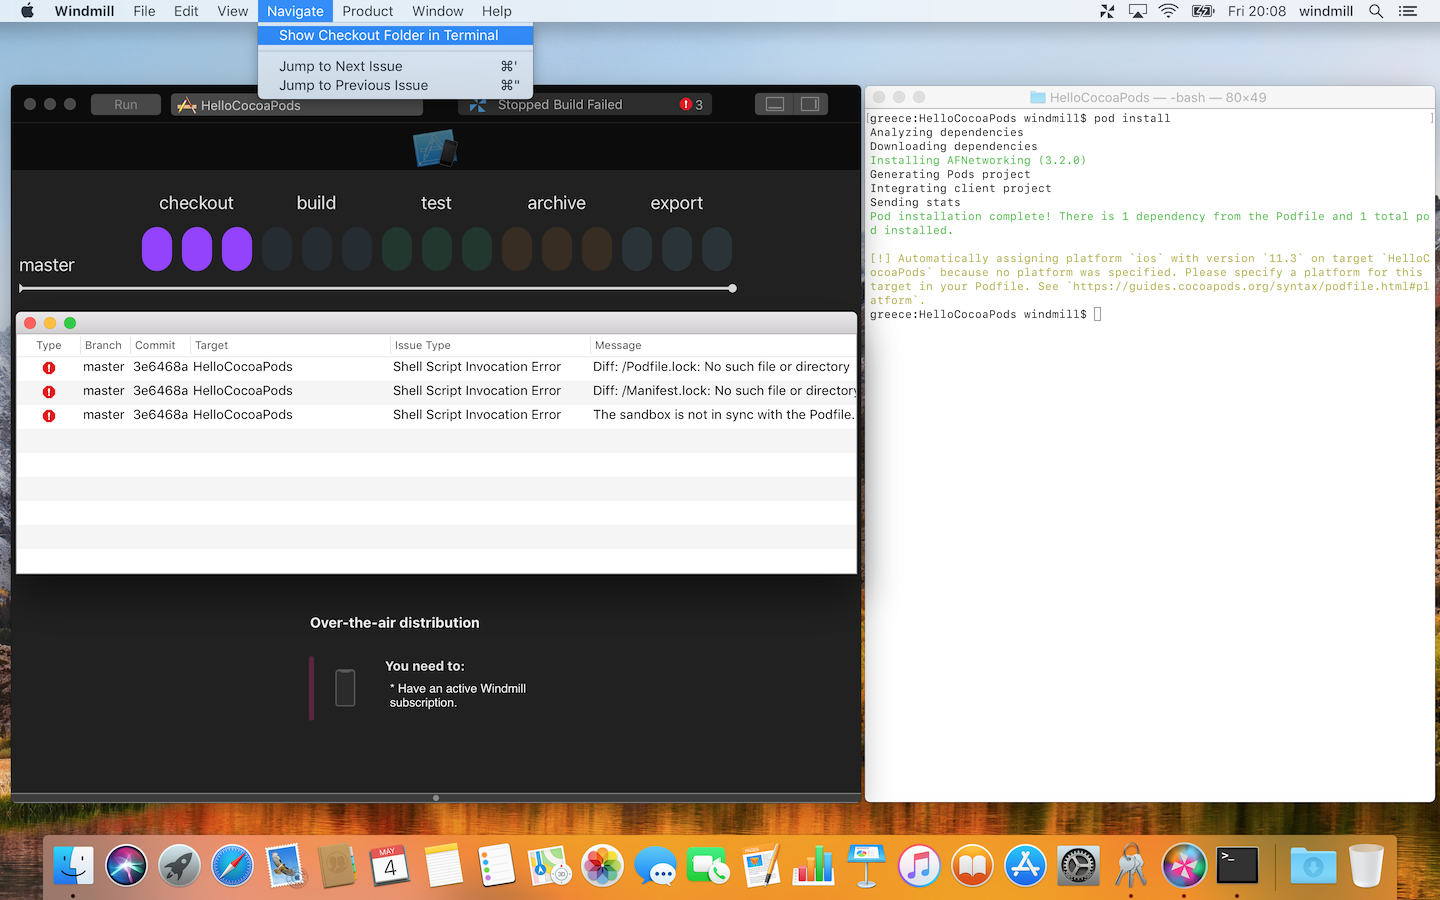
You can now use the Terminal to bring in any external dependencies (e.g. using Carthage or CocoaPods) to your project as monitored by Windmill. For a How-To, open the Windmill Help menu (⌘?).
Keep in mind that Windmill will not automatically update any dependencies as part of a new commit pushed to master.
What’s stopping you?
It is as simple to get started as opening your Xcode project/workspace. Windmill will also provide support along the way to recover from failures and works with even more project configurations than before.
To be part of an upcoming “Showcase” on the website please send screenshots of your app running on the Simulator alongside Windmill.
If there is anything preventing you from using Windmill or you have any feedback I would like to hear it.
If you are the only iOS Developer at a startup or a freelancer working for a client, please get in touch to better understand how Windmill fits into your development workflow.
You can reach me personally at qnoid under the Windmill domain or Twitter @windmill_io.
Windmill 2.0 lays the foundation for the future. With your support, what comes next is only a matter of time.
One more thing…
Windmill already makes it easy to install your app on a device.
Running your app on an iPhone allows you to see how the app looks and feels. It is a great way to do a demo either 1 on 1 or as part of a team meeting.
However it does require a provisioned device to be physically present, making it less convenient for showcasing small updates, asking for feedback, ad hoc sharing of tidbits with the rest of the team.
You can now record and share a 10 second clip anywhere you can share a video.