Developing an app towards its release
approx. 3 1/2 minutes readDeveloping an app is more than writing code. It is about releasing it to the world. Windmill helps you establish a process, strongly aligned with Xcode, to support you along the way towards a release.
On every commit, Windmill builds the Application bundle as well as the Archive bundle. The Application bundle enables you to run your app on the Simulator, say to use the Xcode debugger to inspect and understand the view hierarchy of your app.
The Archive bundle is used to create your project’s IPA so that you can demo your app with your team and later prepare for a public beta using TestFlight or a release through the App Store.
When using Xcode to build and run your app, a collection of build settings referred to as build configuration is used to package the Application bundle.
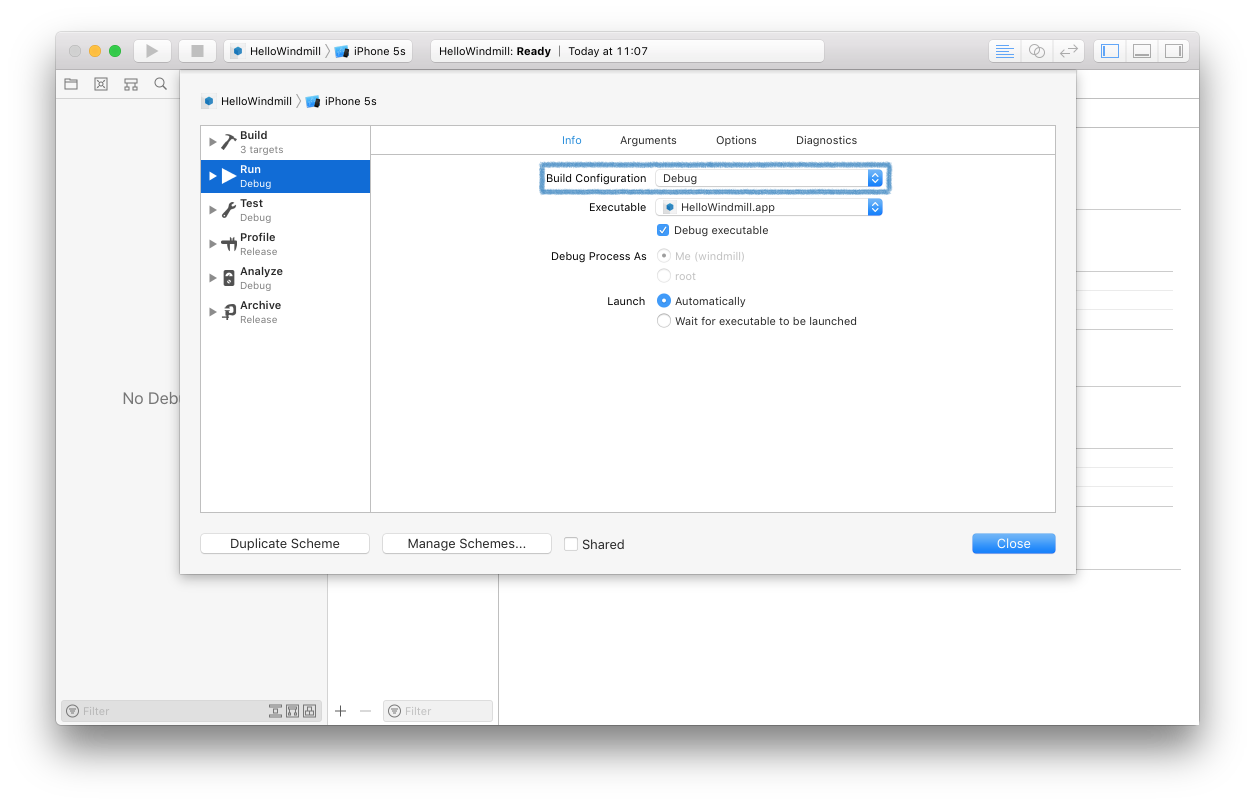
To see what build configuration Xcode uses, open the Scheme editor. In Xcode choose Product > Scheme > Edit Scheme…, then select the Run action for the app.

“A build configuration specifies a set of build settings used to build a target’s product in a particular way. For example, it is common to have separate build configurations for debug and release builds of a product.” - Apple, 2011-05-09: XcodeConcepts, Build Settings
By default, Xcode uses the “Debug” build configuration, also used by Windmill, to build and test your app. To see what build configuration Windmill uses, open the Side panel. In Windmill choose View > Side Panel > Show Side Panel.
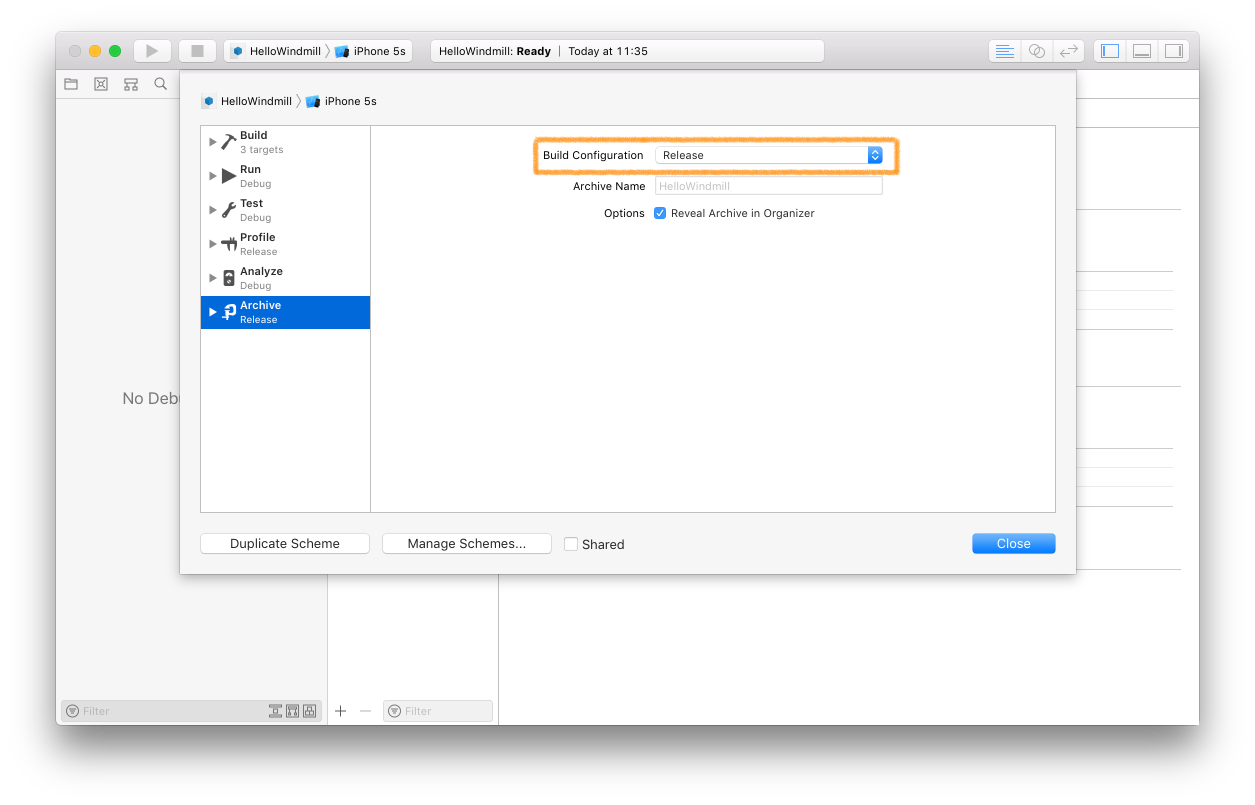
Equally like Xcode, Windmill uses the “Release” build configuration to produce the Archive bundle. The build configuration used by Windmill for the archive is also visible in the Side Panel.

How does that help?
There are at least two ways to take advantage of using a “Debug” and a “Release” build configuration for the development and release of your app respectively.
1. Conditional compilation
You can use a build setting, one for a Swift codebase and one for Objective-C, that allows you to conditionally compile a block of code.
In Swift that is the “SWIFT_ACTIVE_COMPILATION_CONDITIONS” or “OTHER_SWIFT_FLAGS” setting.


In Objective-C that is the “GCC_PREPROCESSOR_DEFINITIONS” setting.

By default, Xcode sets the value to “DEBUG” for both Swift and Objective-C under your Application target.
You can use this value as an identifier in your code to conditionally compile a code path. As an example, this can be helpful if you want to use a different endpoint during development than the release.

“Unlike the condition of an if statement, the compilation condition is evaluated at compile time. As a result, the statements are compiled and executed only if the compilation condition evaluates to true at compile time. The compilation condition can include the true and false Boolean literals, an identifier used with the -D command line flag, or any of the platform conditions listed in the table below.” - The Swift Programming Language (Swift 4.1), Apple, 2018-03-29: Language Reference, Conditional Compilation Block
2. File management
Some build settings specify a file to be used. A common one is the “INFOPLIST_FILE” setting which specifies which property list file to use when packaging a bundle.

As an example, for NSAppTransportSecurity you want to make sure that any exception rules you have for development don’t leak into your release build. This is the case if your development build uses different endpoints to your release one.
In closing
Windmill’s integration with Xcode’s build configurations gives you the ability to manage the development of your app towards a release in a streamlined way.
Regardless of how much you have a need for the “Debug” and the “Release” build configurations, Windmill uses them to build your app accordingly.
Have a look at Xcode’s build settings to make the most of them for each build configuration.
Share your thoughts, experience and how useful Windmill has been so far to you. How has it changed the way in which you develop, iterate, get feedback and deliver your app?
If you are missing out, what’s preventing you from using it?